BitLocker Drive Encryption is a data protection feature that integrates with the operating system and addresses the threats of data theft or exposure from lost, stolen, or inappropriately decommissioned computers.
n
BitLocker provides the most protection when used with a Trusted Platform Module (TPM) version 1.2 or later. The TPM is a hardware component installed in many newer computers by the computer manufacturers. It works with BitLocker to help protect user data and to ensure that a computer has not been tampered with while the system was offline.
n
System Requirements
n
- n
-
For BitLocker to use the system integrity check provided by a Trusted Platform Module (TPM), the computer must have TPM 1.2 or later
-
A computer with a TPM must also have a Trusted Computing Group (TCG)-compliant BIOS or UEFI firmware.
-
The system BIOS or UEFI firmware (for TPM and non-TPM computers) must support the USB mass storage device class, including reading small files on a USB flash drive in the pre-operating system environment.
-
The operating system drive (or boot drive) contains the operating system and its support files. It must be formatted with the NTFS file system.
-
BitLocker is available on Windows 11 Enterprise, Pro, and Education. It is not available for the Home Edition,
n
n
n
n
n
n
n
BitLocker Type Available for Widows 11
n
- n
-
BitLocker – to encrypt and protect the Operating system and fixed data drives
-
BitLocker To Go – to encrypt removable drives such as USB, Memory Cards those are accessed from different devices.
n
n
n
Step1 : Check whether BitLocker already enabled?
n
Open Powershell on Windows 11 in the Elevated Window and run the following command
n
Manage-bde -status
n

n
You can see the Proection Status : Protection off
n
Which means Bitlocker is not enabled and not Protected.
n

n
Step 2: You also can check whether the Volume Level Protection is enabled or not as well.
n
Get-BitLockerVolume
n

n
You can check for specific Volumes as well.
n

n
n
So far, we have identified the device is not enabled with BitLocker. Let’s Get in to Enable BitLocker.
n
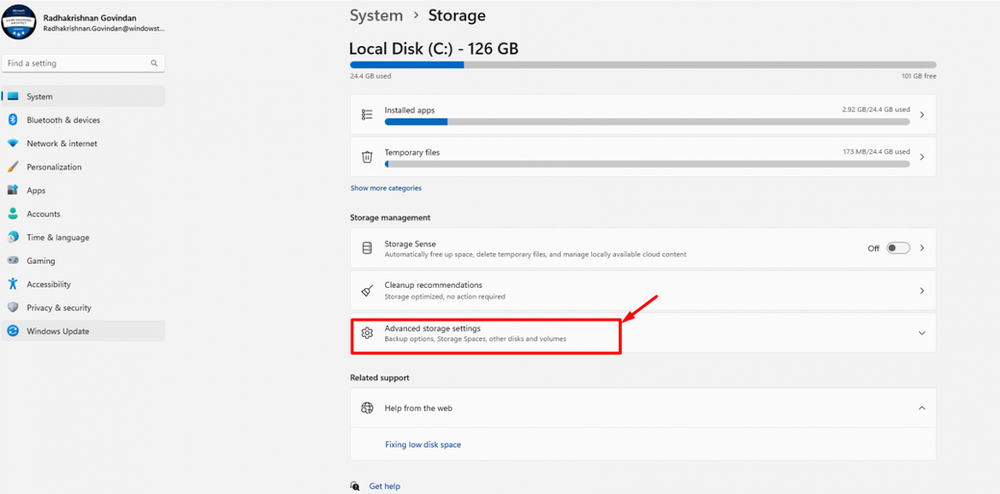
Step 3: Open Windows 11 — Settings — Systems – Storage
n

n
Advanced Storage Settings
n
n
Disks & volumes
n

n
Select the Disk you want to enable BitLocker — Go to Properties
n

n
Click on Turn on BitLocker
n

n
n

n
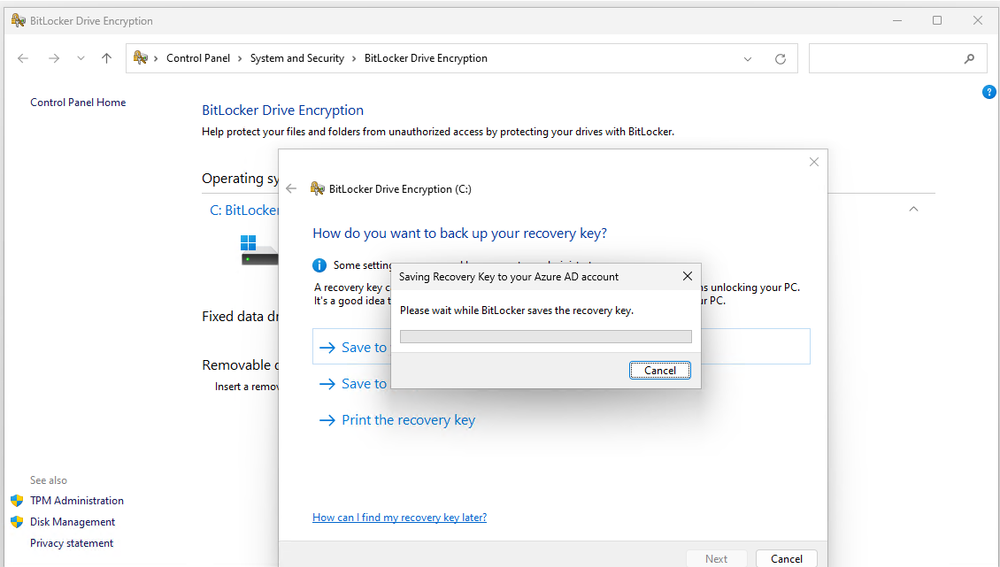
Since I have joined the device with the Azure Active Directory, I have selected Save to your Azure AD Account
n

n
n
n
Click on Next
n

n
n
Select the Option and click on Next
n

n
n

n
Select Run BitLocker system check and Click on Continue
n

n
n

n
Restart the Device post enablement
n

n
Now, You can see the BitLocker is Turned ON
n

n
you check using cmdlet and see now Protection Status: Protection On
n

n
Volume also FullyEncrypted
n
n

n
in Azure AD, You can still see the BitLocker Recovery Key has been updated.
n

n
#AzureAD #BitLocker #Windows #Windows11


